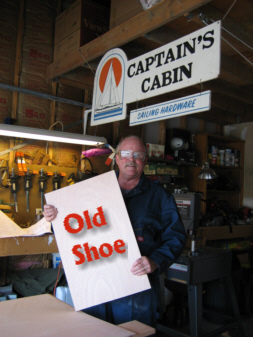
Page 7 - Rigging The Old Shoe
by Dennis Lancaster
On This Page:
Read my plans for this page
Finishing the Cockpit and Installing Hardware
Rigging the Spars and Sails
On Other Pages on This Site:
Site Contents -
The Project -
The Plans -
The Materials -
Bulkheads -
Keel and Ballast -
Winter Projects -
Mast Fabrication -
Putting The Hull Together -
Deck & Interior Assembly -
Sailing My Old Shoe -
Boat Building Links
e-mail to: oldshoe_1@hotmail.com
This page documents with text and photograhs what happemed as I put the interior finishing touches, rigged the spars, and fit the sails on my Old Shoe.
Finishing the Cockpit and Installing Hardware

June 18, 2009 Interior paint and non-skid was applied to my Old Shoe. I used Rust-o-luem marine paint for both the base coat and non-skid areas. I also added four brass cleats to the inwhale and attached all blocks and cam cleats and sheaves for both main and mizzen sheet lines. Cleats were also added to both masts for halyards, etc. It was good to see the boat looking more complete, as the launch date of July 18th was close at hand.
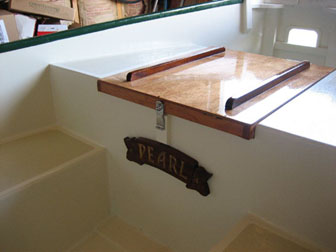
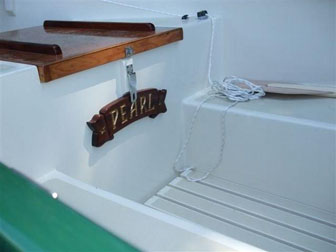
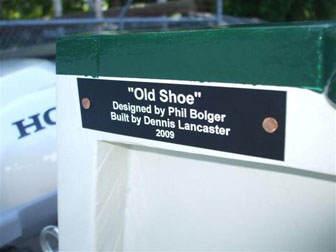
Final coats of varnish we applied to the forward hatch (10 coats total), using Rust-o-luem marine varnish. I am not particularly happy with this varnish, as it seems a bit on the soft side when fully cured. I installed a latch to secure the locker and mounted my boat name board. She is officially called “Pearl”. My good friend Mike Keers graciously carved the nameplate for me. I gold leafed the letters and applied varnish to finish the nameplate.
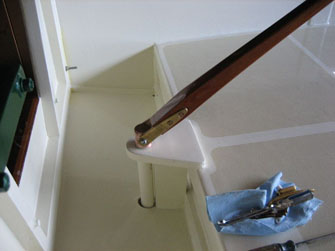
The tiller was at long last mounted to the tiller post. I am very pleased with this setup and the tiller feels very strong and secure. No “play” at all.
I also built a “platform” that sets on the bottom of the aft well. Using cleats on the underside, the platform is level and allows the gas can to sit level and gives a more secure footing if boarding from the aft cutout area. The outboard is well placed for easy control, with plenty of room.
The photo to the left is Pearl's cockpit with hatch and grate installed.
I built a cockpit grate to level out the sole and provide wear protection.
I also added a cockpit drain in the low point of the sole in order to drain the boat and provide drainage in the cockpit while the boat is stored outside.
.
.
.
.
.
.
.
.
.
.
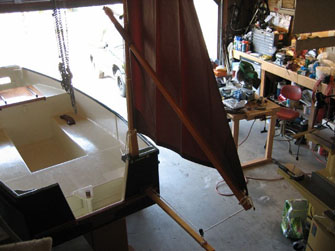
The mizzen sail was laced to the mizzen mast and stepped while the boat was still in the garage. I had enough ceiling height to accomplish this. This gave methe opportunity to fully rig the mizzen with the boomkin and sprit boom. In lacing the sail to the mizzen, I first attempted to use a lacing method I read about with respect to lacing sails during the 1800’s. I later changed this to the method that Harold Payson suggests. This method uses an alternating spiral technique that seems to work very well. I have decided to leave both the main and mizzen sails laced on the masts during the sailing season. Both sails are furled by rolling them into the masts, while at the same time capturing the sprit booms in the roll-up. It’s advised to alternate the roll direction so that the sail does not take a ‘set’.
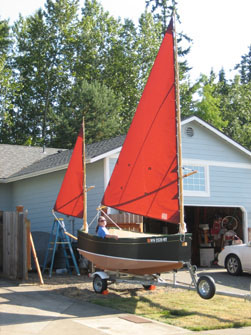
July 17th, we were able to lift the boat to its trailer and get it outside in order to rig the main sail. This is my first photo of my Old Shoe “Pearl” completely rigged. What an impressive sight and it sure slowed traffic on our street.
.
.
.
.
.
.
.
This page was created by oldshoe_1@hotmail.com
Return to This Sailing Page -Home
Return to Solo Publications Web Index
June 18, 2009