Page 4 - Mast Fabrication
by Dennis Lancaster
On this Page:
On Other Pages on This Site:
Mast Fabrication
Site Contents -
The Plans -
The Materials -
Bulkheads -
Keel and Ballast -
Winter Projects -
Mast Fabrication -
Putting The Hull Together -
Deck & Interior Assembly -
Rigging the Old Shoe -
Sailing My Old Shoe -
Boat Building Links
e-mail to: oldshoe_1@hotmail.com
In the spring of 2007, I built the main and missen masts for the "Old Shoe". Hopefully, it will provide insight and perhaps some help for others who may be contemplating building one of these boats.
For raw material, I chose to use Sitka Spruce. I searched for air dried, clear grain lumber and found it through Edensaw Woods in Port Townsend, WA. I instructed them to mill my lumber to spec. I wanted to start with square, straight sticks and that is pretty much what I got. Spruce is probably the very best choice for masts, as it is both light, strong and flexible. You will pay dearly for it though.
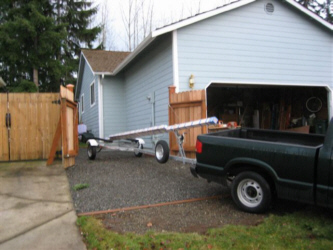
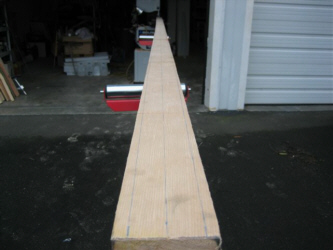
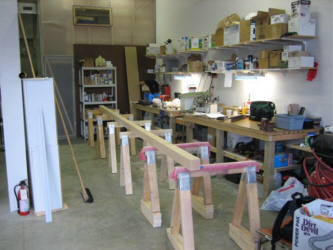
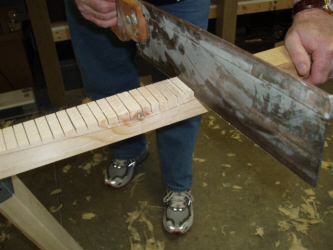
With a main mast that would be 19ft tall, I was fortunate to be able to use my friends shop in Anacortes for the shaping. I transported my square sticksusing my new trailer (see pic #1). A centerline was struck on each stick and taper lofted in from the plans. I layed these lines onto two adjacent sides. Taper was then cut in using a Band Saw (see pic #2). We set up a nice work station in the shop, its nice having the space (see pic #3).
1.  2.
2. 
3.
Tapering was accomplished by making the first cut in one pass, then nailing the cut piece back on and turning the material 90 degs and making the second cut. This method saved us some time and was very accurate.
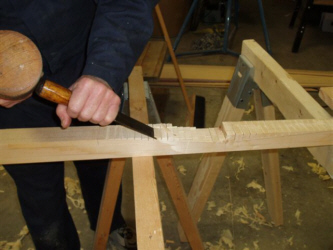
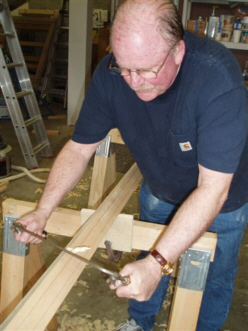
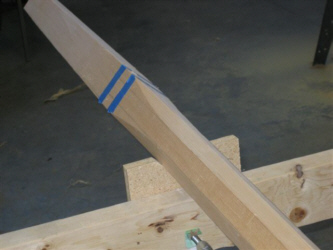
It wasn't until we had the taper cut into the mizzen that we immediately saw a problem. There was a knot in the wood, near the edge and about 4 ft from the top of the mast. Lance and I discussed all the alternatives and decided that the prudent and best way to solve this would be to cut the knot out and scarf new wood in. We used standard 12:1 scarfing rules.
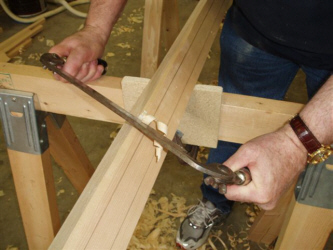
After marking the angle of cut for the scarf, notches were cut using a Back Saw (see pic #4). We then chipped those notches out using a mallet and chisel (see pic #5).
4.
5.
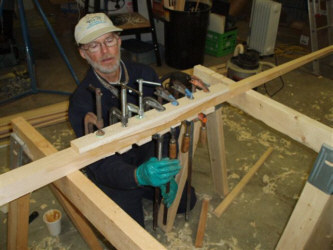
The scarf surface was then planed smooth using a Bull nosed plane and End plane (see pics #6 & #7). A wedge was cut and then epoxy and clamped in place (see pic #8).
6.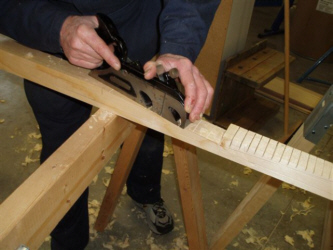
7. 8.
8.
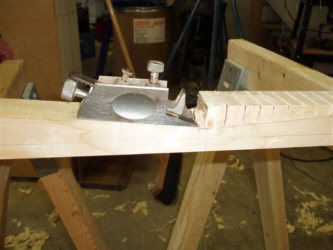
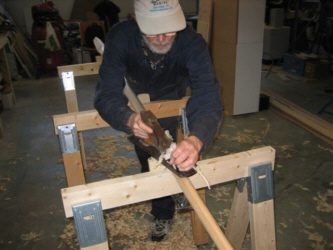
After cure, the scarf was planned smooth. (see pic #9 & #10). After initial taper was cut in, each mast had the high spots planed out. Long board sanding brought each side into square and true.
9. 10.
10.
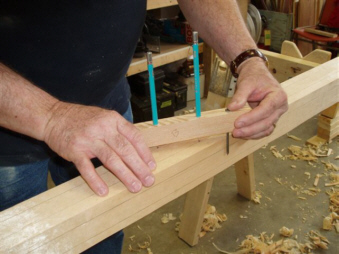
From this point on, all cutting was done by hand tool. In order to cut to eight sides, a taper gauge had to be made. Dynamite Payson's book "Build the New Instant Boats" has a good description on how to make one of these gauges. Lines where then struck on each mast, on all 4 sides, before going to eight sides (see pic#11). Holding jigs were made to position the masts at an angle across the saw horses and material removed by using Draw Knives (see pics #12 & #13).
11. 12.
12.
13.
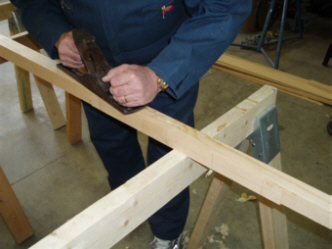
The Draw Knives removed material quickly, bringing the wood down to just above the lines, then the final removal was done with Block and Long Planes (see pic #14). After final planning on all sides, sandpaper was used to smooth and finish (see pic #15). I decided to leave my masts 8 sided for esthetic purposes. I am very happy that I did, the shape of the masts are truly a beautiful sculpture.
14.
15.
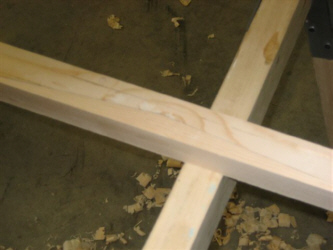
Note the transition from 8 sided to square at the mast partners (see pic #16). The mast tapers to the base as well from the partner.
16.
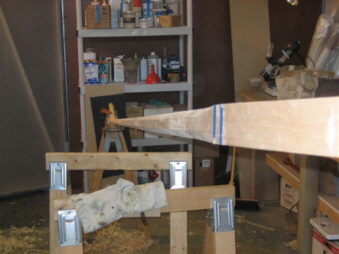
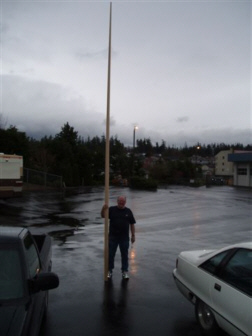
Both masts are finally tapered, that main is a tall stick (19ft) for just a 12ft boat (see pic #17).
17.
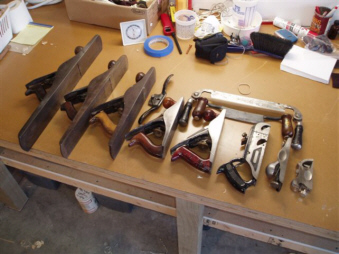
What a learning experience for me. I am so grateful to have had fine mentoring from my dear friend Lance, plus the kind use of his shop. I learned how to use some wonderful hand tools (see pic #18), some are borrowed, some are used and some are brand new. My new masts are still in Anacortes getting a few coats of varnish on (we did use wood filler to fill all nail holes and dings, etc). Even with just two coats on, they are beautiful. I will be bringing them home next week for final varnish work. What an experience.
18.
This page was created by Solo Publications for oldshoe_1@hotmail.com
Return to This Sailing Page -Home
Return to Solo Publications Web Index
May 31, 2007